Tag Archives: SketchUP

Project Ideas with LEDs and 3D Printer

My partner and I came up with some ideas:

  • LED helicopter
  • LED motion sensor
  • Emergency lights- when the lights go off the LEDs turn on
  • pressure pad- LED intensity increases when more people enter the room
  • etch-a-sketch with LED lights and touch
  • LEDs triggered by touch or even noise
  • Light-Up Twister

My Table’s Top 4 Ideas:

1. Supe Cool Light Saber

2. Etch-A-Sketch

3.  Impossible Box (hand comes out and flips the switch)

4. Light- Up Twister

Everybody Else’s Ideas:

1. 3D Printed Jumbo Lantern

2. 3D Printed T-Rex with Light Up Eye

3. Table Catapult (flinging ideas)

4. Small Light-up Christmas tree

5. Light-Up Trashketball Hoop

6. Magical Box

7. Designing a Sign

8. Light Up Bracelet/Jewelry

The Best Invention Ever

Our group decided to make something that would hold cords. We wanted to do this so there could be a place to put cords that they would not get lost or tangled. We also designed it so that it clips onto a table or desk or other surface, so that your cords are easily accessible. To make our chord holder, we made a 3D square in sketchup and cut out the parts to make the shape that hooks onto a table. Then we did the same thing to make the part that holds the cords.

sketchup cord holder


USB Holder Design

My partner and I decided to create a holder for the USB drives. Our first design included a platform/board and then pegs attached. We were baffled however on how we were going to attach the pegs. Finally, after several ideas, we decided that it was best that it was done by divets. We then proceeded to create a model of the product on SketchUp Make. To create the model we used the push/pull, move, rotate, guide lines, and line tools. Our final product is displayed below.


plaquey thingy back plaquey thingy

SketchUp Model of USB Holder

The box is 7.5 inches by 7 inches and has 2 hooks for USBs) on each side. Its purpose is to hold the USBs in an organized way. The box will hang on the metal cage in the corner of the room. It will hold 3 USBs in the box but there is enough room for more than that. Our results are illustrated in the model. We created the box so USBs could be more accessible.

USB holder2

Creating a USB holder

My group was able to come up with a great design and the result turned out to be what we wanted. We wanted to create a USB holder that is convenient and helped the flow of the class room and helped organization. We thought that it would be handy to have our USB holder hanging on a cage in the front of the room. This way it would be easy to quickly grab and would be in a central area. So that was what we decided to design. We also knew that hooks on the side of our contraption would make it even easier to efficiently grab the hold the USB’s. This would also create better organization. After trying a few different designs, we settle on having some sort of hanging basket with hooks along the side. This would create convenient holding spot for USBs as well as an extra organizational tool of the bucket that could hold other items. We soon began working on our design. We managed to create an object that looked a lot like our original plan and would be useful in the class room.

Here is an image of our design:

USB holder2

Home for the Grabber

This past week, my group and I decided to create a home for the grabber. Each one of us created our own idea, and after, we shared them amongst our group. We could not decide whose design was the best, so we combined certain aspects of all of our designs. We took Tori’s idea of having the grabber hang on the side of the board so it would be out of the way, we took Anjali’s idea of having the grabber be held up by prongs, and finally, we took my idea of having a lock so that the grabber could not be stolen. Our design will make the grabber easily accessible and easy to protect.


holder

Making Models

Last week, we made a model of a tool that Ms. McDonald can use to hang her grabber on the whiteboard.  our design lets her hang the grabber off of the side of the whiteboard, so it is not in the way of her writing.  Our design includes prongs to hang the grabber on, and a lock so that people cannot steal her grabber without permission.AutoSave_Grippy Project 2

Creative Creations: Small Bucket and USB Holder

The entire process of began with the idea to construct a carrier for the USBs which randomly were placed around the room– easy to get lost. We first began brainstorming ideas on which would be the most effective tool which could also serve for different purposes. We came up with different designs. The first being a mobile stand which had the shape of a cross. There would be hooks for the USBs, but we figured the plastic wouldn’t provide a strong base (since we had to print it on the 3D printer), therefore, that idea was thrown out. The third idea which was proposed was a heart which would be attached the wall with hooks, but that was immobile which wouldn’t come in handy. The third idea was proposed: a small box with hooks on the back so it could hang and easily be removed from the metal cage. Hooks would be placed on the outside of the box so that the USBs could hang there, and small miscellaneous items could also be placed inside of the box if desired.

The process of building the box on SketchUp wasn’t as easy as it seemed. We struggled with creating all the details and makings things work. However, we pulled through and we created the SketchUp. Before we began creating our SketchUp we had to take measurements, so that the hooks would fall in the right places on the cage. At the end, we made the box a turquoise blue.

USB holder2

Making of USB Hanger

Katherine and I first started brainstorming ideas with a quick search through Google Images. We didn’t want to make something generic and boring, so we looked through a lot of designs and picked one that stood out to us the most. We created three sketches (pictured below). We eventually decided on the third option because it was the most aesthetically pleasing.

usb sketches


I have past experience with Sketchup, so I did most of the actual modeling in Sketchup, while Katherine gave input. Since the design was symmetrical, I was able to cheat a little and just create half of the model, copy and flip it, and piece it together with the other half. In the end, our finished project turned out pretty cool!

usb hanger

Sketchup hangers for USB drives

Our group decided to try to make a hanger sketchup for USB drives. We went through many different pictures on the internet to search for a design that we liked to do. When we finally selected a design, I had the picture up on my computer and Kiera had the sketchup up. We worked on trying to recreate the image while adding our own twists to the project as well. The result is a 3D model of a hanger that may be used to hang the USB drives in the makerspace.


usb hanger

USB Drive Hangers

For our project, my partner and I decided to make something to hold the USB drives. We thought of a bunch of ideas, but most of them were just different types of baskets. We decided to go with our most unique idea of hangers. This idea came from when I remembered that my mother uses something a little like this design to hang her aprons. For our design, we have three hooks all attached to each other that can be hung on the wall, and used to hang the USB Drives. We decided to go along with this idea instead of our others, which consisted of different forms of baskets, because we wanted something that would stand out. When we actually starting to make our design in sketch up, we had a little trouble making our hook 3-D. We also had trouble rotating them the way that we wanted. After we got over those hurtles, we were able to bring everything together.

JPEG USB Drive Hanger

A Complex Solution for a Simple Problem: Storing USB Drives

Our group decided to take on the task of making a storage system for the three USB drives that the Art and Design class possesses. We drew three different designs, each looking vastly different from the others, but the one that we ended up with resembled a protruding wheel that had four spokes jutting out. We designed the contraption in three parts: the first being the base that would support everything else, the second which would hold the spokes, and the third which would resemble a washer and keep everything together. We are very proud of our result and hope that it will serve the Maker Space well.USBWheel1


Part One – The Base


Part Two – TUSBWheel2he Wheel


USBWheel3 Part Three – The Washer

Grabber Grabber

board holder 2d pic


While ironic, the art and design room needs a grabber for their grabber. This handy tool allows us to reach up and bring extension cords down so we can charge tablets. Unfortunately there isn’t really a spot for this tool to go. So where does it end up? Just lying around on tables. I know! Ridiculous! Well our problems are solved with the grabber grabber, by RR Industries (Rohit and Raiden). This small yet convenient tool allows for easy storage. It’s dimensions allow for it to fit snugly to the white board and after that all you have to do is grab your grabber, activate the grab mode and put it into the holder. The tool takes advantage of the fact that the grabber expands when you release and compresses when you grab so after expanding it can’t fall through and just hangs from the tool. Then to get your grabber, simply pull the trigger to grab, and the grabber will easily slide out. The process of coming up with the grabber grabber was really good for the overall project. At first we found the concept we wanted to do and didn’t want to come up with others so much but in the process of coming up with others, we came up with ideas to add. Then we used the techniques we learned in SketchUp to get a real visual of what the grabber looked like and were able to modify and tweak the design as we saw fit.

Cat and (Computer) Mice

meowmeowmeow

For our project, we decided to create a holder for the computer mice. Because both Sara and I are witty nerds, we decided we wanted to play off the word ‘mouse’ and do something creative and functional. We settled on a cat paw, so the claws could hook the ‘tails’ for the mice. The design was difficult, as there were a lot of curves and symmetry to account for. However, with some teamwork and bouncing of ideas, it turned out really well.

3D Sketchup Idea

Our group decided to create a pencil holder that would fit into the rectangular opening of Ms. McDonald’s front table. The pencil holder will be fit to size of the rectangular hole in the desk, then adjusted to be slightly small so the box can be lowered into the opening. A centimeter wide stability was placed around the top outside edge of the box so that it would be able to hold itself up on the table.

Pencil Holder

SketchUp Group Project

For our  model to be 3D printed my group chose to do a pencil holder. We each came up with separate ideas, then had another group chose the best one. We ended choosing my idea, which was a pencil holder in the form of a space ship. It worked but have the center hollowed out which was where the pencil cup slid in to. We then created  it in sketch-up on one persons computer, after taking measurements of the cup.

Pencil holder


3D Sketchup Idea

We started our design process by sketching a basic three compartment pencil holder. We then refined it, and took measurements of the hole that the pencil case needed to fit into, and then began to draw it in sketchup. We sketched out measurements and just slowly drew in the lines. Pencil Holder- 2D graphic

Pencil Holder to Fill All Needs

Pencil holderPencil holder2

To design the pencil holder, Grace and I first drafted a few sketches. One had four holes that were rectangular and the others had circular holes. When making it in SketchUp, we realized the best way to maximize space would be to combine two and take the best aspects of both. We then started with measuring everything and then using the rectangular tool, line tools, and measuring tool, and then used the push pull tool to create the holes and walls. We realized during this that the walls couldn’t be flat, so we added millimeters of depth to them. Thus this blue creation surfaced.

New Pencil Box


For our pencil box, we wanted to have in functional for all needs. you have a section for pencils, a section for your stylus, a part for the charger, a part for pens, and a part for erasers.  we were able to do this and have enough room for many pencils, pens and erasers so that if a pen runs out of ink or a pencil breaks, there is always another one there because there is that much room!!!


Pencil holder

Pencil Holder for Maker Space

pencil holder


Adrienne and I worked together during the first day to complete sketches of our pencil holder. We wanted to make it more complex than any simple pencil case, so we bounced around ideas and decided to divide the case into four sections. Two sections would be for erasers, thumb tacks, etc. and the other two would be to hold pencils or pens. The next few days we used rulers to take measurements of the table, and worked in sketchup to formulate our product so that it would fit in the empty space of the table. I am pleasantly surprised with how well it turned out!


Pencil Holder SketchUp Design

For our sketchup project, Emma and I decided to make the pencil holder for the tables in the Makerspace. We started by designing the sketch on paper, and we tried out many different designs until we decided our favorite. Then we started to use sketchup to make a 3D version of it. We had to use many different tools to get it the picture shape. Then we had to find the right measurements and use millimeters on SketchUp so that we would know if the holder would fit in the table. pencil holder

Claw Clasp Evaluation of Design Process

Each member of our group made a design and we ended up liking Cade’s design the most so we chose his. Once we chose the design, Cade and I got the exact measurements while Chase made the rough draft/ outline of the design on sketchup. After Cade, Chase, and I finished with our respective duties, we tweaked the rough draft made in sketchup by incorporating the exact measurements. We were finished once that happened but the result should end up with this design attached to a magnet on the board. The two holes in between the clamps of the gripper will easily slide on to the two cylinders and stay there.
AAAAAAAAAAAAAAAAAAAAAAAAA

Reflection on Claw Clasp Model

Claw Clasp

The “Claw Clasp” is an innovative way to clasp the Makerspace claw for the ceiling outlets. In the 2D Graphic above you can see our model for the claw to be held up, but this model needs a little explaining to see how it actually works. On the back side of this design, the 8″ by 5″ support structure has a magnet glued on, which will attach to either white board in the Makerspace. The front side has 2 cylinders, symmetrically spaced from the center for balance and sturdiness, and measured to fit in the top slots of the claw. To construct this design, the members of our group consisting of Chase, Joe, and I each brainstormed an idea, and eventually we chose mine in an attempt to create a good holster for the grabber. Once to work, Chase made the rough draft and outline, and Joe and I measured and found the best measures for practicality.

Overall the project has gone well so far, the only problem we had was a way to sink the magnet into the base structure so it doesn’t stick out the width of the magnet.

Gripper Holder in Sketchup

The first step in our design process, after we decided that we wanted to make something to hold the gripper, was to make three different sketches. Then we all chose the design we liked best, which was to make something that hooked on top of the whiteboard and held the gripper underneath the claw end. We made it in Sketchup next, using measurements from the whiteboard. gripper holder picture

SketchUp – Hook Design Process

When we were given the task of designing a piece on Sketch Up that could improve the classroom, I was nervous. But, once we choose what to do, i was excited. There were possible challenges when creating a hook to hold the grabber in the classroom. One possible challenge was preventing the hook from not balancing because it had to stay on the board. Another challenge or a possibility was the question: How should this hook hold the grabber? The answer was not immediate but after 5 different designs we settled on one. The double sided hook to solve the balance problem and the bump up in the grabber allowed for the design to hold the grabber inside it’s handle.

The overall process was fun and a learning experience. Its a cool thing to think about; that there is a chance something I helped design could actually be used.

Here is our design:

Room Improvement Project - Board Hanger - 8-26-15


3D Printing Design

We started out trying to decide what to do based on the list we were given. We decided to go with a holder for the “grabber” and starting individually brainstorming ideas for it. We got together and chose the best one. Then, we worked with the other group to see if they had any good ideas. That was unsuccessful. We polished off the idea and put it into Sketchup. Below is a picture of our model.

Grabber Holder for MsMAc

Pencil Abductor 9000 (pencil holder)

What happened at first was that we drew our 3 pictures. When we got the feedback from the other group we decided to combine 2 of our best ideas into one. So, what ended up happening was that we combined a spaceship with a pencil cup holder and added a few more aesthetically pleasing things from the other idea which in turn resulted into the Pencil Abductor 9000.Pencil holder


Solving our USB Storage woes

It was easy to decide which of the problems we were going to devise fix to, as neither of us wanted to work on the other choices. after agreeing to the USB storage solution we got to work. After throwing out a couple ideas we decided it would be better to state what first came to mind when we thought of a ways to store USB’s. We then based our models around the basic ideas; pegs, shelves,  and blocks. Our first model idea was very similar so we essentially mashed our ideas together to create a model. The next two models were alterations of the same style with different modifications to the practical use of the model. After consulting with our table mates and agreeing on the model we were both leaning towards, I was able to run free in Sketch-up and design the model with any aesthetic alterations that I pleased, since it was a very basic idea with only a few specific elements that were required. I did all the Sketch-up work and I found it really fun and relaxing, too. Overall I was glad I was able to practice/use Sketch-up more.


USB Container

What I Did in SketchUp Today

AAAAAAAAAAAAAAAAAAAAAAAAAToday for my group I made the overall outline of the product we did. They gave me an idea of what they wanted it to look like and I just made a simple sketch. They then went in and put in the measurements for each of the objects to make them exact. We got the overall SketchUp today and we exported it and turned it in. I think it was more difficult to get all the exact measurements and put them into the SketchUp. I am glad I didn’t have to take part in that because I would have failed.

The Greatest USwag-B Holders

For our makerspace design, we thought there was a dire need for hooks to hold the USB’s. First, we hand-drew three different designs to ensure we had the best, most useful model. Next, in order to make our design sturdy, we measured the dimensions for our hook so that it wouldn’t be fragile and break. Then, we transferred our design into Sketchup and applied our decided measurements to the software. Now that the hook was 3-Dimensional and our measurements were to scale, we were able to export it to an .stl so that it could be 3D printed. In our end result, we achieved a durable, yet sleek design that can now be used daily in the makerspace.

usb holder 2d

Pencil Case Adventure


We created a pencil case to hold pencils, pens, and other classroom necessities. We accounted for the length of one full unsharpened pencil, so nothing would stick over the top. This pencil case is designed so it would fit perfectly in the holes in the tables, and the top would be a half inch above the height of the table. I created this with sketchup using the push/pull tool, the guidelines, and line tool.


Pencil Case

Designing a Pencil Case

My group designed a pencil case that will fit in the rectangular opening of the desks, to usefully store pens, pencils and such paraphernalia. In order for the case to be suspended from the table, a one inch lip was created to hang over the edges of the table’s opening. After creating a simple sketch of our design, we made a to scale design in Sketch Up, that we will soon print three dimensionally. Our result (our Sketch Up design) is shown below.

Pencil Case

The Amazing USB Holders

Last week we designed a holder for the poor USB’s with no home. We had to measure, adjust, and work together as a team to make it work. We started when we each drew three different designs that could work for the holder. After making adjustments, we chose a design and started measuring. It had to fit over the white board so they would never get lost again! Then after all that was done, we finally got to do the fun part, designing it in SketchUp! It took lots of math (which wasn’t fun), but we got to work together and I think it turned out great!

usb holder 2d


Makerspace Accessory Experience

During art & design we were given an assignment where we have to create and accessory that will be an asset to the Makerspace. I got together with my group of Elizabeth, and Maggie. Out of the options that we were given we decided to make a USB holder. As we brainstormed we came up with three ideas. The first was a basket on the refrigerator, a clamp onto the front table, and hooks to hang on the wall. While we considered what would be the most useful we choose the clamp on the table. I think that it will be easy to access, secure, and is very creative. From there we measured the table and created it on SketchUp using the skills I talked about in my previous post. To insure that the clamp would be secure we added a hole for a screw. Knowing that this is a competition I am confident that this design will be very successful.

usb holder

Makerspace Accessory Competition

My group, Kennedy, Elizabeth and I, chose to create a device to hold/store the USB drives. We noticed that all of them had cords, so we chose to create something like a hook hanging off the table. We originally had three ideas, the other two being a series of hooks that hang from the wall, a bin that had a magnetic back to hang from the whiteboard. The final product slides onto the table and you can then screw it into the table with the graduated hole in the bottom. Creating the graduated hole was probably the hardest part of the project because of all of the different surfaces and trying to get the circle on the right surface to push/pull it so it disappeared. I think we did a good job of taking the measurements and recreating our idea in SketchUp.usb holder

What I did today in sketch up

Today I learned how to create new things on sketch up. I learned how to create the board on sketch up. It was very difficult to make this design because it was very small, but we worked through it and made the best possible design that we could. We made the design for the power cord handler thing to hang on the white board, and we think that it will be effective and work.


My invention

Whiteboard-incorporating Grabber Rack

After looking at three potential designs for an effective grabber rack, we decided on a rack that was composed of two pieces.  The pieces would be attached to the top of the whiteboard and would hang towards the front.  We did encounter a problem when considering how to put the actually grabbing part on the board, but eventually decided that the grabber end could hang off the board.  The two pieces of the rack would the front and back of the grabber’s pole.

RackImage

The Cewl Computer USB Case

CaptureWe first had 3 ideas, all of which were USB case. We had a giraffe, person, and a computer. We decided on the computer pretty  cewl right. We then started to create our cewl computer USB case. The hardest part was tilting the computer screen, but other than that I thought it went smoothly. Overall I feel like our product was a success.

Computing About Computers!

Joe and I had a couple ideas before settling on a USB case similar to the heart, person, and tank that already exist. We decided to make ours a computer, because we thought it was funny to plug a computer into a computer. Our designs translated very well into Google SketchUp and the product will hopefully come out well. At first it was very large, so we shrunk it in half and got our final design.

Grabber Holder

Our group (Josh, Ross, Shane) made 3 different designs to hold the grabber on the white board. We made on to hang it vertically on front, one horizontally on front, and one vertically on the side. We decided on the horizontal hanger, which has two hooks and supports it across the board. We made it red to contrast the blue of the grabber.
Grabber Rack

Tubular desk organizer


pencilCase graphic final

In this assignment, we decided to create a desk organizer/pencil holder. Our first three ideas that we came up with were tubular which was about the size of a cup and had translucent tubes that spiraled around the outside, this would be used to hold pencils. Our second idea was a hedgehog shaped pencil holder. The hedgehog shape would have holes in it that the pencils would be stuck into. Our final idea was a rectangular box that had handles on the side in order to fit into the whole in the table. In the end we decided Tubular was our best option and would function the best. During the process we measured pencils and markers and decided that instead of having pencil sized tubes we would have marker sized tubes so that each tube could fit multiple pencils in each and markers. During the process we also changed the size of the product, instead of having it be a couple of inches wide we decided that 7″ would enable it to be a desk organizer and allow it to hold more things. We also decided that instead of having the tubes spiral around it could hold more if the tubes were straight up. The product turned out very well and I think the changes enabled it to be a better product than first imagined.

Tubular Desk Organizer

For this assignment, we thought decided to make Mrs. MacDonald a more organized way to hold her writing utensils on her desk. Initially, the tubes were diagonal, but we decided it would work better if they stood straight up. The tubes are big enough for makers and short enough that pencils will not get stuck in there. There is lots of space to put things such as erasers, led, and pencil sharpeners in the middle.

tubular desk organizer jpeg

Modelmazing!!!!!

This past week, our group decided to make a place to put the cord grabber. We decided to make something that will hang off the side of the board so it can stay of the way, while being easily accessible. The cool thing about our hanger is that it has a hinge and can lock. This is so that unwanted perpetrators can’t take the grabber when left unattended. The hanger easily attaches to the top of the board with two prongs for the grabber to hang. We offer a simple, minimalist design that is supremely effective in the ways of organization and possession. AutoSave_Grippy Project 2


The grabber’s hang out place

Our groups project was to design something to hold the grabber with. After coming up with a few designs we finalized  the hook idea. The hook idea is where  two hooks, as seen in the picture, are placed on top of the white board. The grabber can be easily placed on to the hooker. We wanted a simple design that would work well. Our design allows the grabber to rest on the hooks with ease. Board Piece

The Grabber’s Residence

Our goal was to create a piece that would allow the grabber to rest somewhere on the white board. We decided to make a hook, of which we would make two of. The hook would sit on top and over the back of the white board. On the back, the hook would extend 7 centimeters down to ensure that it does not come off. On the front of the board, the hook would extend 6 centimeters down and would have a 2 x 2 centimeter hook for the body of the grabber to rest. There would be two hooks, one hooked on the top of the white board and the other hooked about a foot and a half away. These would allow for the grabber to rest horizontally on the two hooks. We decided to choose this design so that the grabber could be placed on the hooks with ease and it would also not be a challenge to remove the grabber from the hooks. Also with this design, the grabber is not blocking or interfering with the white board in any way, as it mainly covers only the rim of the board. Here is an example of the hook that will be used in creating the grabber’s residence:

Board Piece

Whiteboard holster for makerspace grabber

To construct the holster, we decided to brainstorm ideas. We each took about 10 minutes and jotted down ideas that coma to mind. After everyone had explained their ideas, we agreed on using a hybrid between Harrison’s and Leo’s idea. First, we sketched the idea on paper and considers the materials we would need. We then made minor modifications and began building the model in sketchup. After finishing, we brainstormed further add ons and decided to add magnets to make the grip even stronger. By the end, we were left with a satisfying product that would suit our needs

Grabber Holder for MsMAc

Learning Sketchup

I learned a lot about sketchup. I have used it in the past (7th grade math), but that is the only extent of my knowledge. I learned the basic functions of sketchup, as well as how to create simple 3D models. I also figured out how to round out corners (see chairs) Here’s the dining room I made. Chair_FINAL


USB Holder Design

Our groups design was a box that hangs on the wall to hold the USBs and their accessories. An important thing that we added to our design is that there is a little lip around the entire inside of the box that is 1/5 of an inch that secures the USBs and makes sure they do not fall out. We also have a tab at the top with holes for screws to go threw so it can be screwed into the wall. LizUSB

Making the Accessory

Our design was a holder on the wall of the flash drive compartments. We started it off with making three designs and we chose one that will be attached to the wall and have an opening to put in the flash drive. It worked out really well and our end result was exactly what we wanted it to be!!

Art and Design flashdrive compartment


Making the Accessory

Our design had a lot of versions but we figured out less is more. The design was basically to have mail slots for the USBs to be housed in. The measurements were hard to mess around with so that everything fit together.  Our design ended up being something like an oven without a door. We also added a lip with holes so we can hang it easily. We also took away multiple slots and just put one big slot.  LizUSB

Rotating USB Dispenser

Our design is a rotating post, meant to be mounted on the wall. It has four extension, from each of which will hang a USB. It is design to be able to pass on a USB as quickly as possible. When one USB is taken, the motion pushes the next to the front. Designing the item was fairly easy. Illustrating it however, was more difficult than anticipated. Our main difficulty lay in attaching a circular base to a rotating rectangle. In retrospect, it probably would have been a lot easier if we hadn’t tried to get such exact, even measurements.USBWheel1USBWheel3USBWheel2

The Pencil Holder to Fix All Problems

This pencil holder was designed to fit into the little hole in the top of most desks where the charger used to go. Now instead of just sticking your foot through the empty hole or passing notes to your other table mates, stick this handy and very dandy pencil holder in that empty, dark hole! A great place to store your pencils so you never to have worry about it rolling off a table or not having one because we all have been through that moment where you either don’t have a pencil or you lost it right before a test. Knowing that this problem is among us, my partner and I decided to design this remarkable device. We wanted to make this a versatile pencil holder and did so by creating many different compartments for any utensil even erasers. As easy as it may seem, it was very difficult to design. After making the measurements of the hole in the desk, my partner and I started to sketch the design with the measurement compartments in OneNote. As we all know the hole in the desk has rounded edges and SketchUp does not give us that option to make rounded edges. With that in mind, my partner and I decided while sketching make the pencil holder a rectangle and shorten the length so that it was able to fit in the hole while making the lips that hold it up longer. After that, designing went pretty smoothly. We were able to create the shapes and break them into smaller compartments which was very easy since we had already done the measurements. The measuring tool and line tool definitely came in handy during this step! However, once we made the design following our measurements we decided to decrease some measurements because they looked strangely long. The main thing that we changed was the depth of each of the pencil compartments from 7 inches to 4.5 inches in order to be able to see the tops of pencils, markers, or whatever else one desires to put in the holder. We then realized that we had to add thickness before pushing/pulling the compartments. This wasn’t that much of a set back stating that we were then able to press Ctrl Z multiple times (BEST KEYS ON THE KEYBOARD FOR SURE). After this we added color to the holder and then the master piece was created. After orbiting around the pencil holder and seeing that 3D object the we had created, we became very confident and excited as our hard work had payed off. We hope this pencil holder will deem worthy for everyday use as the amount of lost pencils and minutes of asking for one will decrease.

Pencil Holder

The Adventures of the Wondergroup 8/26/15

On Wednesday, my team and I designed a holder for the USB cords in the maker space that can hang off the white boards. We took the measurements of the white boards and corresponded that to the size of the holder so it would fit well. We tried to make the majority of the sides around 1-2″ thick to make sure it hung on well.  We made it an ‘S’ sort of shape so it would hook around the whiteboard snug, then hang out for the USB to hang from. We also put a triangle on the front of it to keep the USB in place and for decorative purposes.

usb holder

The Rescue Pencil Holder

When your trying to find measurements, and are writing them down for a split second you put your pencil down, pull out your ruler and measure. After that short amount of time you turn back around, and “boom,” your pencil is gone. It rolled off the table and now you have to spend 5 minutes trying to find it. Well, my partner and I designed the pencil holder that comes to the rescue. This pencil holder has many compartments and different levels for holding different things. It holds erasers, pencils, pens, and anything you want to put inside it. Even though this sounds like the most amazing object to design ever, when designing we came into some problems. It was very challenging to get the pencil holder with rounded edges, so we had to change our design a little. We had to make the pencil holder a little smaller with a longer lip. This way, we could keep all of the lips the same length on the table, but we had to change our measurements just a little bit. We also played around with how long each of the levels were. We started with the longest edge being 7 inches, but looking at the design in SketchUp we realized that 7 inches was probably a little long, and this way the pencil wouldn’t be sticking up out of the table at all which would be a little bit of a hassle. We changed the length from 7 inches to 4.5 inches which we thought would be the best length to hold the pencils, so while it still went below the table, the pencil was still able to stick out of the top. Each of the compartments in the pencil holder we made equal, so that the pencil holder wouldn’t look asymmetrical or sloppy. We soon learned that using Ctrl Z on the keyboard was a life saver. Anytime that we didn’t get a compartment right, or forgot to add guidelines and we just starting free drawing, we knew our best friend Ctrl Z would always be there. The last thing that we did to perfect our pencil holder was change the colors. This alone took us 20 minutes because we always forget the inside walls of the pencil holder. We would orbit around the whole object checking to make sure we didn’t leave out one spot, which in our eyes would make the pencil holder look unfinished. In the end, we are very confident about this design and are very excited to start using the pencil holder which comes to the rescue. Next time you need to put your pencil down for a few seconds, don’t fear the pencil holder will be near.


Pencil Holder


Project to Hold the Grabber Tool

Our group, RJ and I, started off with a couple different ideas, some simple and one more complicated than the others. The one we chose was the more complicated one, because we decided it would be fun to challenge ourselves. The idea was to create a way to use the spread of the grabber tips to hold itself. When the trigger is pulled, the tips come in, allowing the grabber tool to squeeze through an opening, but when the trigger is released, the tips catch on the sides of the opening, holding itself. Throughout the design process, we took accurate measurements and made our idea a real thing. We worked together to figure out how to mount the project on the board, and we came up with something that we felt was practical and would easily hold up the grabber tool. We were very proud of our result.

Here is a picture of our design:

board holder

“What is that Hexagon?”

ART AND DESIGN MODELOur group worked together very well in order to create a hexagon that has some holes in it. I think that we had a good group vibe and we each brought individual talents to this project, and I am very proud of the end result. At the beginning, we decided to make something that you hadn’t asked for, because we figured that we would definitley have the best design for something if we had the only design for it! We chose to try to clean up some of the cluttered pvc pipes because they are always laying around the makerspace. We each designed a method of sorting them, and then we folded them together to create the amalgamation of awesomeness that we ended up with. It was the simplest design, because we didn’t want the device to be complex, because its simply a holder for other things, it shouldn’t steal attention. I am very proud of our end product, but I am even prouder of our process.

Pencil Container

For this project, we created a pencil holder which fits into the open holes in the tables. We had to measure the size of the holes and create a pencil container in SketchUp which fit into each hole. We also added six holes on the side to hold extra pencils and another larger hole on the other side to hold smaller objects such as paper clips and erasers. The center hole which is meant to fit into the tables and is about 5 1/2 inches deep. In the end, we also made a small cover which can slide over the top of the container to close it off when it is not in use.

The Container


SketchUp Group Project

Our model idea was a pencil holder. Each member of the group created unique ideas and planned them out on paper. Our group collaborated and came together to choose the best idea.  The final idea was a pencil holder that resembled an alien saucer. We created it in sketchup and we now plan to 3D print the final product. Pencil holder

Learning Sketchup

In sketchup, we learned how to build our own chairs. After we created our chairs, we made a dining area, by importing a rug and then building a table. We had to use orbit tool, guidelines tool, line tool and protractor tool. The skill i found most helpful was the push/pull tool.


Dining table

Learning SketchUp

In SketchUp, I learned how to create my own chairs, tables, and rugs. To do this, I had to learn many skills and had to learn how to use the tools of SketchUp. I learned how to use the orbit tool, the guidelines tool, the protractor tool, the line tool, and more. I also learned how to import a rug onto my SketchUp page (even though I didn’t end up using this rug, I still acquired the skill.) Another thing I learned in SketchUp was how to put holes through something, and how to push and pull. At first I was uncomfortable with the SketchUp program, and really did not know how to do anything, but now I think that I could design a dining room easily with the skills that I’ve acquired.

DINING ROOM1234567890

Learning SketchUp

We have been doing Sketchup for the past few classes. In class we learned how to make a chair and a table, and how to maneuver our creations. We used guide lines, the move tool, the rotate tool, and many others to make this creation. We also made the components of the table, and chair, so we could maneuver them more easily.

chaiiiiiiiiir n table

Learning Sketchup

I learned how to make certain objects like chairs and tables without importing it from the program itself. I was able to do this by using guidelines and making things like chair legs the way you want to easily. I also learned how to color these objects and expand them as well as being able to rotate them in multiple different ways. These past few days using sketchup have enhanced my skills and I will be able to operate sketchup with ease for future use in this class and other classes. chair and table

Learning Sketch up

At first sketch up was very difficult for me to understand, and it was very hard to use, but as I used it more it got easier

I learned how to make houses, chairs tables, spin things and so on. The first thing I learned how to do was make a box, but until the second session I didn’t know how to spin the screen, or  zoom out ext. but later on I learned how to. picture of my chair and table and upside down chair, and people

Learning SketchUp

I learned how to build a chair without downloading off the web. I also learned how to use different functions of the program in order to bend it to your will. I was also taught how to make automatic measurements without having to drag to the precise location. I learned how to rotate objects to turn them many different ways. I was taught how to add skins to your object and how to download object off of the online web. I feel now that I can go back to SketchUp and make my own house with a reasonable amount of time and assistance. I would like to thank Ms. MacDonald for the help she has given me in order to be successful with this program later in life. STUFF

Learning Sketchup

In Art & Design class, I was taught how to use Google Sketchup, a 3D software in which we made chairs and a table. Though at times it was frustrating, it was very cool to see the finished product of what we had created.  We were able to take something like a simple dining set, and make it into our own, unique design.

dining room post

Learning Sketchup

Sketchup Table Chairs

During the class periods I spent in Art & Design using sketch-up I learned a lot about the basics, and began dabbling in complicated tools and methods for creating 3D designs. I began by learning how to use tools to move and look around, as well as creating shapes and making them into a 3D model. Later on I got into more advanced techniques for creating models, like using guild lines and puncturing holes, as well as shifting the compositions of shapes I made.

Learning SketchUp

This past week in class we used and explored with the design app SketchUp. We learned how to use the different tools to assist us while creating our objects. The main ones that became the most prominent and useful were scale, orbit, push/pull, and guides. With those tools we created six chairs with one at a different angle and a table on top of a carpet. With the basic skills that we used I am confident to use SketchUp to create my own designs later in this class.

table and chair


Learning SketchUp

Last week, I learned that though it may seem very difficult, SketchUp isn’t too bad once you get the hang of it. I learned how to make a chair, a table and insert a rug. Once you figured everything out, such as how to use the tools, everything became a lot easier. The chair was pretty easy to make, It wasn’t until you had to make the whole dining set that it gets a little more difficult. However, with practice and a whole lot of perseverance, I can now present to you the most incredible dining room you will ever see. chair

Learning SketchUp

I learned everything in Sketchup because I didn’t know anything about it or what it was before. Sketchup was completely new to me, but I learned a lot about it and the basics of how to make stuff and do what I want to do using the program. This is a useful tool for creating 3D objects.

sketchup chair

Learning SketchUp

Over the past week, we learned how to use the many different aspects of SketchUp. We did this through experimenting and making a dining room setting. This includes the chairs, tables and room in the picture attached. This helped me to better understand how to use SketchUp so that i can be successful in art & design this trimester.

chair

Learning SketchUp

chair of victory

I learned that it is a whole lot easier to use an external mouse in SketchUp. Also, once you get used to using the rotate tool and how the program works it is really easy to make cool stuff. There are so many different tools in Sketchup it can take a bit of time to get used to but once you do it is really easy to make almost anything you want. There are so many things that you can do with SketchUp and it is really limited to your imagination, and if your good at using it.

Learning SketchUp

Sketchup Chair

I learned many new things in SketchUp, as this was one of the first times I’ve ever used it. I learned about the different tools that help you to design items in sketchup, such as learning how to use markers and lines to precisely cut edges and I used other tools to elongate faces of shapes, or to cut out faces of shapes. After we used the different angles, lines, and shapes to create a symmetrical and realistic design, we used texture tools to add realistic hues and shading on our objects. Once  we had finished our models we uploaded decorations and finalized them.


Learning SketchUp

During my Art & Design classes so far I have learned a lot about SketchUp. I love SketchUp and it was so much fun to learn new cheats and ways to make my creation better. I have learned how to make a table, how to move my designs, how to rotate my designs, how to add other people’s creation into my work with Windows Components, and so much more. I cannot wait to learn more about SketchUp and continue with my creations and designs. Blog Post House and Table Blog Post House and Table2

Learning SketchUp

While learning how to use SketchUp there were some new things that I learned how to do. When we were making our sick nasty chair the first thing that we learned was how to use the push pull tool. While making the dinning room we had to rotate our sick nasty chair on top of our table. This part was hard at first but I think I have the hang of it now.

From your favorite student, Joe
From your favorite student,
Joe


SketchUp Dining

chair and table


While using SketchUp to make this dining room with a table and chairs, I learned a lot of useful features. To make the chair, we used exact lengths, the push/pull tool, the guidelines, and the 2 point arc. In order to make more chairs and position them correctly, we had to use the copy/paste feature and learn how to use the rotate tool.

Learning Sketch-Up

I learned a lot about Sketch-Up because I had no previous experience with it, except for about 2 classes in middle school. I learned how create shapes, and use the push to make them 3D. I learned how to use the paint bucket to color my creations, as well as how to use guided lines to make accurate shapes. I also learned how to rotate shapes. I made chairs and a table using my knowledge:

Blog Picture

Learning SketchUp

Since I had not used Sketchup much, I learned a lot these past few days. We learned a little bit about each tool and how they work. We also learned the important lesson of how to undo!! Lastly, we learned we could make lines a certain length and typing enter, which was very helpful. Now I feel comfortable utilizing these tools to create whatever I want.


table and chairs

Sketchup Table and Chairs

tablechair

During our time using Sketchup, which was mostly a review for me, we created a table and chairs.  The chairs helped me review all the tips and tricks of creating an object to the correct size, and the table helped me review rotation and proper object movement.  I did learn how to assemble a collection of items into a component, but the rest was a nice refresher to the world of Sketchup.

Learning SketchUp


chair2


This is a picture of an abstract table that I created using the program SketchUp.  The chairs and the table were constructed over a few hours total, and it was very challenging.  This was done by numerous rotations, push/pulls, and slides.  I look forward to using SketchUp more often!

Learning SketchUp

Last week in Art & Design, we learned some of the basic features of Google SketchUp. Although I used SketchUp in 7th grade for the 1st time, going over the all the tools made something that I thought was complex much easier. It was really fun to play around with the colors, and I was so proud to show off my small dining room (pictured below).  Rotating and moving the chairs was the hardest part, because there were 3 axis that needed to be manipulated. My favorite too was the paint bucket tool – I must’ve changed the colors 5 times! 🙂

chair2d

Learning SketchUp

In Art & Design class, we used a computer program called Sketchup order to build a dining set. Through the process of building this dining set, I learned many things about Sketchup. I am now able to successfully navigate the program, and perform functions such as draw, erase, create guides, and push or pull. I also now know how to move and rotate objects in order to create a scene. Here is the dining set that I made:

Sketchup Dining Set Side View

Learning SketchUp

SketchUp helped me learn how to work in 3-D space, specifically how adding depth to a work space affects the creation process. I learned how rotation of objects isn’t limited to arrows, but actually is set to an axis. Manipulating the space by creating objects, adding depth to them, and rotating them made it easier for me to imagine how people like Architects and other artists would use this program for a practical use.

Table with Chairs

Learning Sketchup


Last week we learned about sketch-up. I learned a lot about sketch-up such as shortcuts. Before it was very tedious to click back and forth to switch between tools, but by learning the shortcuts it was much faster. I also learned about new tools. By using these, I was able to accurately remake the dining room set pictured below.

Chair

Learning SketchUp

I learned a lot about Sketch Up while making these chairs and this table. I used to just play around and let whatever happen on sketch up happen. However, I learned how to measure objects and to make them a certain size. I learned how to cut out pieces and rotate or move pieces around. I also learned how to put something actually on top of another thing and not just floating in space. Basically, I learned how to specify and create more accurate objects. practice chair

Learning Sketchup

I learned how to use guidelines, different perspective tools, paints and fillers, and how to move things around properly as well as build.  This was somewhat tough to do alone at first but was generally pretty easy.  Just somewhat frustrating at times.

EChair

Learning SketchUp

During these few days of Art & Design, we have played around with SketchUp and learned how to create chairs with designs on the back of them and tables. Learning about the “push-pull” tool and how we can rotate things, draw shapes, and how to put certain designs on objects such as water, grass, wood, or stone. We created a whole dining room!

Chair and Table Creation Sketchup

Learning SketchUp

I learned the basics of SkethUp such as creating simple 3D objects and then using a few simple steps to make them into more complex looking things. Making the actual tables and chairs was really easy once I figured out how to make each object a component. Once I did that, I could then make as many copies as I wanted in whatever color I wanted and move them wherever I wanted, so that was cool.


Chair


Learning SketchUp

Grace Chair

While using SketchUp I learned how to make guides, correctly push and pull, make all the legs of a table the same length, use the push/pull tool to make a hole, and use the rotate tool. I also learned how to make it so that something we created will not move. The last thing that I learned is  how to

Learning SketchUp

I learned about rotating and different ways to use the push pull tool. For instance when you push something back to where it is blue and white, that means that it won’t show up. I also learned how coloring works as well as putting in a floor. I’m bad at sketchup so this was good for me to have.chloechable

Learning SketchUp

Chair proto

While making my dining room table, I learned a lot of neat tools and how to use them. I learned how to make guides and measure things, as well as how to make full objects, and move/rotate them. I also learned about the push/pull, follow me, and offset tools. Overall, I have a much better understanding of sketchUp entirely and how to use it to make precise models.

Learning Sketchup

During the past couple of days in the art and design class, we learned a lot about how to use sketchup to make interesting 2D and 3D shapes. For this project, we learned how to make chairs, a table, and a rug in the sketchup program. One of the many things we learned in sketchup was how to use a push and pull tool to take a 2D object and make it 3D. Creating the chair allowed us to learn that this tool could also be use to take 3D objects, and carve pieces out of them. Creating the carpet allowed us to learn how to change the pattern of objects. Overall in this class, we learned a lot about how to use sketchup and I thought it was a very interesting experience.

sketch up chair

Learning SketchUp

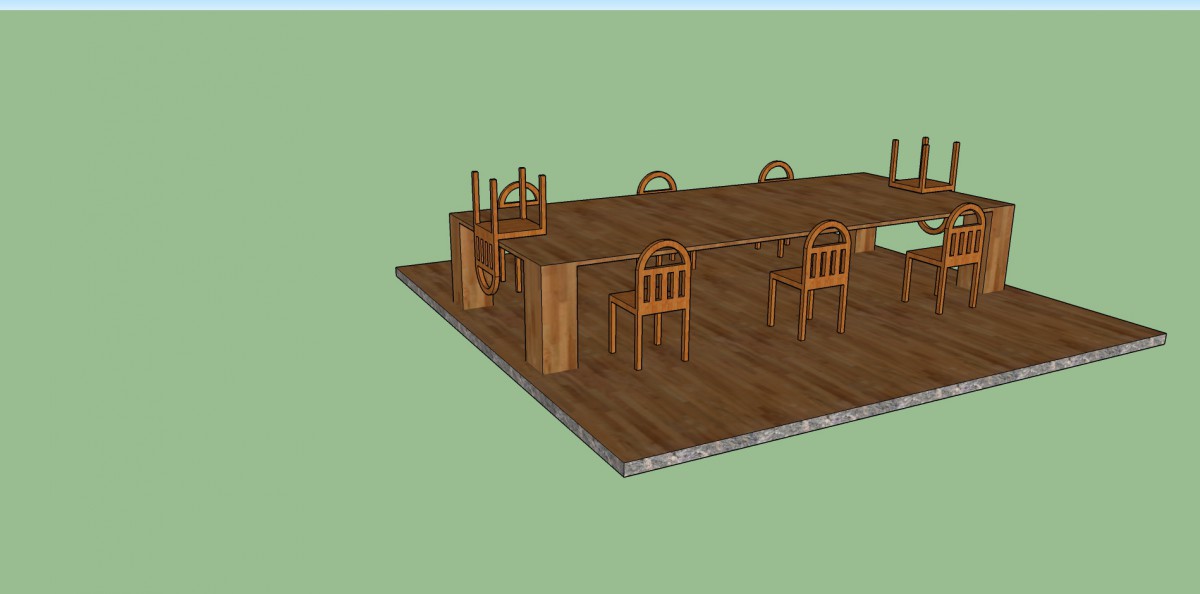
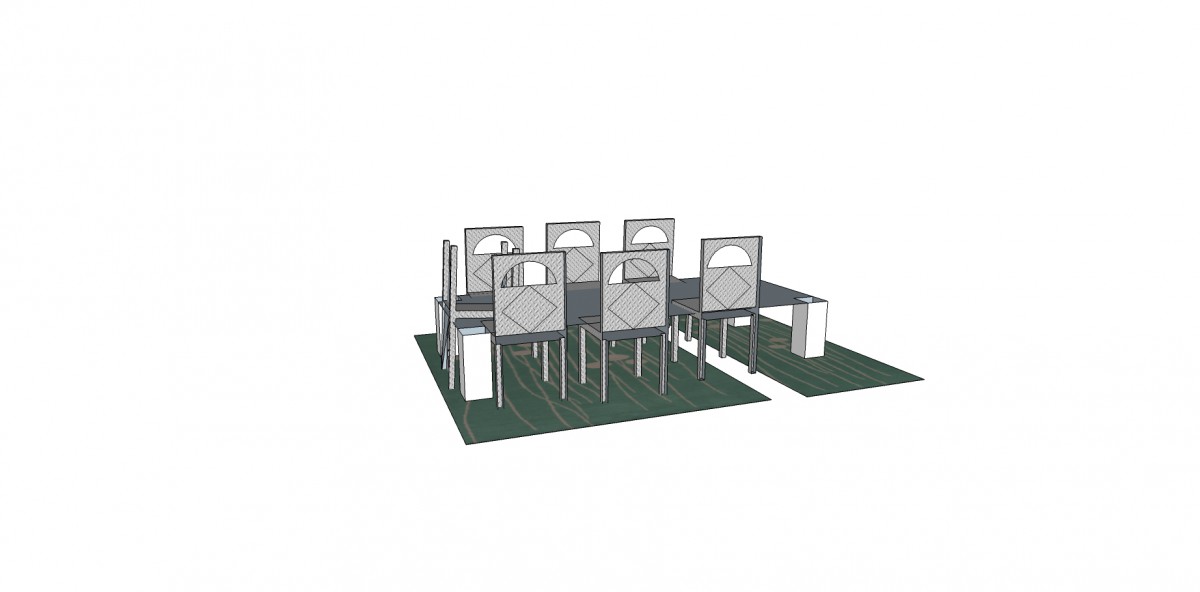
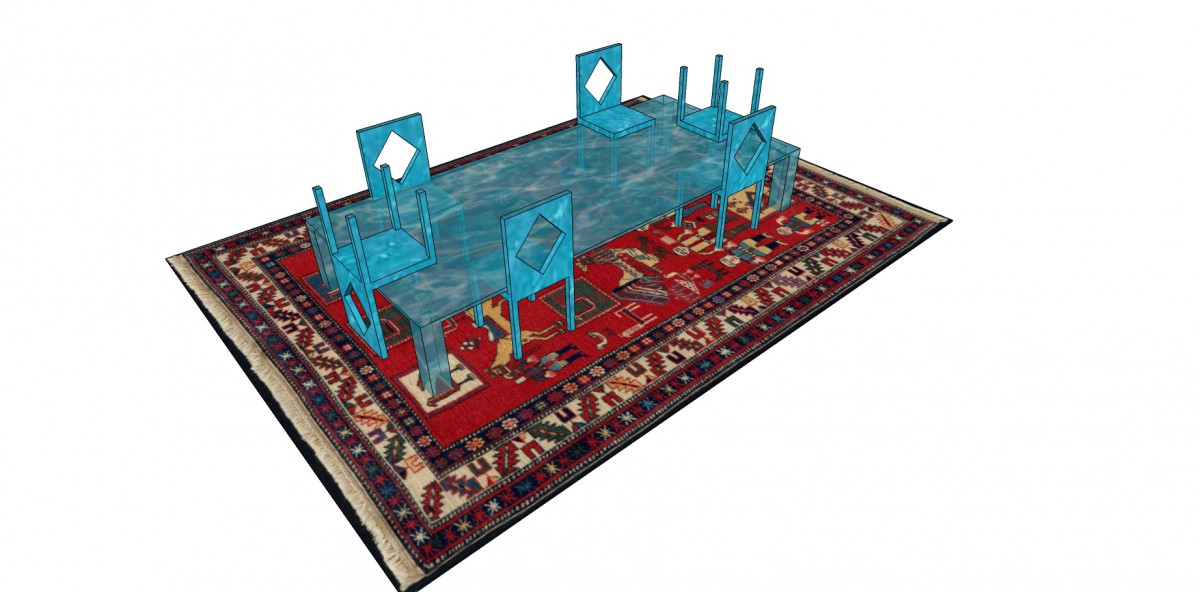
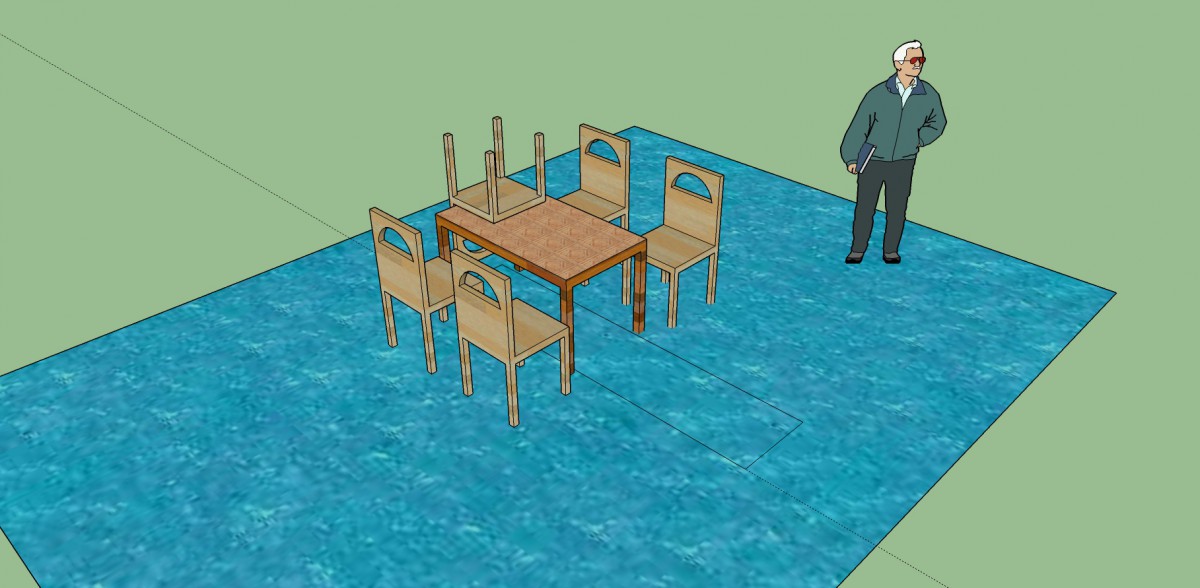
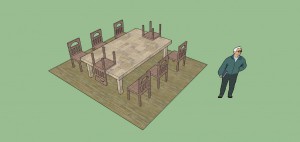
During this, my first experience with SketchUp, I firmly believe that I learned more about myself than I ever could have without using this wonderful tool. Having the ability to conjure and banish any material goods was truly a transcendent experience, because it offered me the ability to see the world as a God, and the perspective and life lessons that I took away will affect me throughout the rest of my time on this mortal coil. When I first deleted that beautiful man with the sunglasses and thusly removed him from ever having existed, I was able to understand fully the feeling that runs through the veins of the adolescent cheetah howling through the savanna when he first sinks his teeth into the fleshy gazelle, which, in the case of this metaphor, represents a dining room set. Throughout this experience, I learned not only about the orbit, push/pull, and move tools, but also about the very tools of humanity that reside inside us all. I was able to observe, through the most immersive experience possible, the inner darkness that motivates normal men to kill, gentle men to commit acts of vicious atrocity, and cheetahs to eat dining room table sets. On SketchUp, I was a god. On SketchUp, I was master of all I could orbit to, and those who existed in my make-believe world were simply peons, and I could make anything or destroy anything. For the first time in my life, I was able to empathize with Dr. Frankenstin, for now that I have brushed the face of God, I must find this power again. I need to command the world that SketchUp has let me see. I will find you, aviator man, and every time I see you, I will STRIKE the delete button. I will STRIKE with savagery for now, now I am supreme.

Learning Sketch UP

For the past week we have been working with sketch up.  We have made a dinning room set.  This set had three chairs and a table.  The class learned how to rotate, measure, and move objects along the three axis.  We created oLearning sketch upbjects with tools such as the push/pull.  Here is my dinning room set.

Learning SketchUp

Dining


In SketchUp we learned first the basics like the viewing tools. Next we used those tools to move around and create different parts of our chairs using guides and the pencil tool. Now we were left with a couple of chairs and a table scattered about. This led to using tools like Push/Pull and Rotate so that we could play around with our creations and position them the way we wanted.


Learning Sketchup

Learning how to use the program Sketch Up changed my life. After a few days of tutorials, what used to be a bunch of buttons, turned into doorways for exploration. I had become Dora the Explorer and Sketch Up was my Backpack. I learned how to use the feature guidelines, which turned into the Map, always showing me the way. I discovered the paint bucket tool, adding color into my Sketch Up model just like Boots adds liveliness does to Dora’s adventures. I also used the move tool, taking things from one place to another, just like Dora’s enemy Swiper.

After an adventurous time while using Sketch Up, this is what I came up with:

chairPIC

Learning SketchUp

For the last week or so, I have gone from not knowing how to do anything on sketchup to building a dining room set. I learned how to draw simple shapes and use the push, pull tool to make them 3D. I have also learned how to change views, make guides, and rotate on different axis’. After all of that, here is my final dining set.

Nell Dining Set


Learning SketchUp

While working with SketchUp I learned how to move things around and rotate. I did not how to rotate at all when I first started using SketchUp, and by the end I could move chairs upside down, flip over tables, and do so much more. I also learned about the push/pull tool and how you can make cutouts in different objects. Sometimes the push/pull tool acted out, so I also learned how to move around the difficulties and delete the insides while push/pulling. By the end of the class of the dining room table I learned how to navigate my way through SketchUp.

Sketchup Chair

Learning Sketchup

Using Sketchup, I learned that guides can help you size an object and make everything the same size. I also learned that it is really easy to put together final products once you have the original design done, since we were able to just copy and paste. I also learned that you can make any flat surface look like any material, such as fences or leaves. This is my picture of the finished dining room:

dining room

Learning SketchUp

Before I started Art and Design, I knew absolutely nothing about SketchUp. In this class, I started learning more about how to use SketchUp starting with the basics of how to orbit and how to zoom in/out. I also learned how to draw simple 2D shapes like circles and rectangles. Along with learning how to draw simple shapes, I learned how to then make those shapes 3D by pulling them out and how to cut out shapes in a chair all by using the push/pull tool. I also learned how to make guides using the measuring tool and how to enter in dimensions, which is something I will need to know in the long run. The most important thing that I learned how to do was turning objects. I know I will be using this a lot and having to flip a chair upside down on top of the table helped me understand how each axis worked.

Below is a picture of my completed dining room set:

Chair Picture

Sketchup Learning

Capture

This is my dining room set. It is meant to reflect the model of chaos, what with the off kilter table and chairs and the obvious color clash present in the disgusting, mucus green. It’ll probably sell for 4 million dollars and go into some CEO’s third mansion. Anyway, learning sketch-up was pretty easy. I still don’t feel like I’ve totally mastered rotating things, but it’ll come. Having a mouse feels really nice. I like guides, but I don’t think I’d use them all the time.

Learning SketchUp

Last week in Art and Design class, I learned how to create a table and chairs. I also learned how to rotate a chair so that it is upside down on the table. I used the push pull tool to make planes into 3D objects, the ruler to create equal dimensions, and the protractor tool to position the chairs and table. This is my completed dining room:

Table and Chairs

Learning SketchUp

This past week I learned how to do many things on SketchUp. I learned how to push/pull an object, which can be helpful when building giving dimension to anything. I also learned how to use the drawing tool to help make legs and cutouts in the chairs. I learned how to rotate an object three ways so I could make the chair flip over and rotate the table to be right side up. I used all of these tools while constructing my dining room below.

Sketchup Table and Chairs

Learning Sketchup

In the project, we learned how to properly move, rotate, and duplicate objects in Sketchup. We first made a chair by using the draw and push/pull tool. Then we added a table for the chairs to sit around. Then we duplicated the chairs and used the rotate tool to position them around the table.

Chair Picture

Learning SketchUp

In the process of learning SketchUp, I learned how to copy and paste items. I also learned how to rotate and move the items to form a shape. I also learned how to push and pull sides of the piece with the push pull tool. Finally, I learned how to make models of things in SketchUpSwanson Chair

Learning SketchUp

I had only used SketchUp once before this experience and that was in 7th grade for a project. When we did that project though, SketchUp wasn’t really explained to us and we were just kind of thrown into it and had to figure it out on our own. While using it in this class, I got to learn everything step by step and I know so much more now than I did then. I learned things such as making a component, how to alter the dimensions, how to navigate moving and rotating items, and more.

Here is the product I made with Google SketchUp:

Picture of Table Set

Learning SketchUp

In Art and Design class last week, I learned how to create chairs and tables with equal legs and surfaces. I also learned how to rotate tables and chairs and learned how the guide lines functioned. In addition, I learned how to make straight lines using guide lines and the ruler. This helped me when I had to use the push/pull tool to create a space in the chair. Below, is the dining room that I created during the previous week of Art and Design. Chair and Table

Learning SketchUp

In Sketchup, we learned first how to navigate around the space we were using. We were given mouses, so we could scroll, zoom in/out, and orbit easily. We next learned how to create objects by using the push/pull tool. To make a chair you would set your dimensions, then push and pull, add more shapes, until finally you came out with a chair. Then after saving it, we learned how to create multiples. Finally we made a table using the same basic steps, and then we were taught how to change the color and design to make it our own.

table set pic for blog