All posts by aleksiak598

Project idea’s for LEDs and 3D prints.

Brainstorming things we could 3D print that use LEDs. Be aware, this is a very raw and not selective dump

1. light up cup

2. light up door handles

3. light up table  leg covers

4. light up shoes

5. light up head band

6. light up sunglasses

7. light up clock  extra

8. light up Christmas ornament

9.  light up bins

Our tables top 4:

1. Table leg covers

2. Halloween basket

3. Coffee cup with heat sensor

4. light up glasses


The other tables top idea’s

1.  Tissue box

2. Flashlight

3. Paperwight

4. Night light with light senser

5. light up belt buckle
 

Let’s LED it up

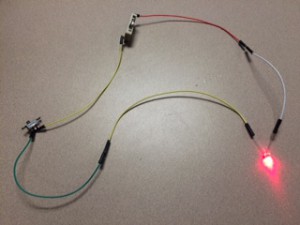
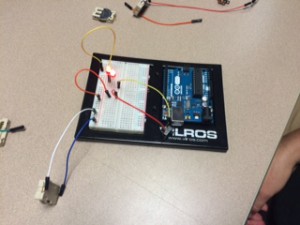
I learned many things from watching the LED it up video’s. The things I learned go from simple to more complicated. Before today I didn’t even know what a bread board is! Now I know that they are little pieces of medal underneath certain parts of the bread board that I boards made of plastic with holes in them. There are also little pieces of medal underneath this holes. You can put cables inside these holes, and the medal from underneath will complete the circuit! This circuit can them light up an LED. This is a very useful things to know. I also learned that while creating circuits it is important you know which side of is it positive and which is negative. This seems like common knowledge,  most people know that negative goes to positive and the same vice versa. But now I know when it is important and when it doesn’t matter. Last but not least, I learned that their are female and male cables that can be used to create a circuit. Male cables have wires that go out, and female cables have wires that go in. Thus, you can connect them by sticking one inside the other.  This makes life a lot easier because without them things would need to be held together with our own hands. Yet, these are only the things that I have learned from the first 5 video’s. I’ll continue watching and learn even more about circuits.

Here are 2 images of what we created:


art and design 1


art and design 2

Creating a USB holder

My group was able to come up with a great design and the result turned out to be what we wanted. We wanted to create a USB holder that is convenient and helped the flow of the class room and helped organization. We thought that it would be handy to have our USB holder hanging on a cage in the front of the room. This way it would be easy to quickly grab and would be in a central area. So that was what we decided to design. We also knew that hooks on the side of our contraption would make it even easier to efficiently grab the hold the USB’s. This would also create better organization. After trying a few different designs, we settle on having some sort of hanging basket with hooks along the side. This would create convenient holding spot for USBs as well as an extra organizational tool of the bucket that could hold other items. We soon began working on our design. We managed to create an object that looked a lot like our original plan and would be useful in the class room.

Here is an image of our design:

USB holder2

Learning SketchUp

I learned a lot about Sketch Up while making these chairs and this table. I used to just play around and let whatever happen on sketch up happen. However, I learned how to measure objects and to make them a certain size. I learned how to cut out pieces and rotate or move pieces around. I also learned how to put something actually on top of another thing and not just floating in space. Basically, I learned how to specify and create more accurate objects. practice chair