All posts by harrisont778

Project Ideas for LEDs & 3D Prints

My partners and I are ideating about something we could make with a 3D printed design that uses LEDs:

1. LED Reading galsses

2. Flashlight

3. iPhone Case

4. Key chain

5. Iron Man Helmet

6. Eiffel Tower

7. Speakers

8. Watch

9. Necklace/ Jewelry

10. Rubix Cube

11. Magnets


TOP TABLE IDEAS

1. Human heart with lights to show pathways

2. Light up dagger/ baton/ lightsaber

3. light up brain- different areas to light up

4. Light up sign (CA, makerspace, exit, etc.)


1. Water bottle that lights up depending on how much water is in it

2. Light up hair extensions

3. Light up Eiffel tower

4. Light up watch

5. Light up glasses

LED It Up

I learned about making circuits, using resistors in those circuits, and the basics of writing/ fixing code for making an LED blink every second.


When making the circuits themselves, I learned how to make sure that the circuit is fully connected from both positive and negative leads along with a ground. I also learned to use a resistor in the middle of a circuit in order to make sure the LED it is connected to doesn’t burn out. Finally we used code to program an arduino to make an LED blink every other second. Part of the code wasn’t working perfectly, so we had to modify it to work for our purposes. Here is the code:


/*

YouTube Demo

Arduino Tutorial – LED Blink / Code Included

*/


//Sets Red to digital pin 8 and Green to digital pin 7

#define Red 8

#define Green 7


void setup()

{

//Initializes pin 8 and 7 as outputs

 pinMode(Red,OUTPUT);

 pinMode(Green,OUTPUT);

}


void loop()

{

//Blinking

 digitalWrite(Red,HIGH); //Red on

 digitalWrite(Green,LOW); //Green off

 delay(500); //Wait half a second

 digitalWrite(Red,LOW); //Red off

 digitalWrite(Green,HIGH); //Green on

 delay(500); //Wait half a second

}

IMG_0531 IMG_0532

Sketch of Holder for Ms. MacDonald’s Grabber Tool

Grabber Holder for MsMAc


This is our holder design for the grabber that is used for many things in the Maker Space. The holder itself will be mounted on the side of the white board for easy access and storage of the grabber tool itself. The length of the two holding arms is long enough so that it will be as close as flush to the top of the grabber’s handle as possible. In order to make sure that the grabber doesn’t fall from the hook when it is hanging, magnets will be attached to the grabber and the holder itself. In order to use the grabber, all the user needs to do in theory is pull the grabber away from the holder for quick release, the opposite for returning the grabber to its holder.

Learning SketchUp

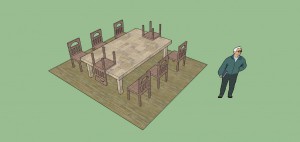
I learned the basics of SkethUp such as creating simple 3D objects and then using a few simple steps to make them into more complex looking things. Making the actual tables and chairs was really easy once I figured out how to make each object a component. Once I did that, I could then make as many copies as I wanted in whatever color I wanted and move them wherever I wanted, so that was cool.


Chair