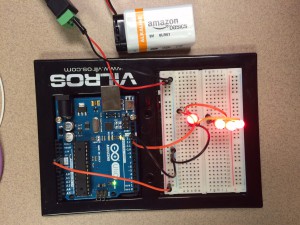
Today in class we learned how to use LEDs in multiple ways. While we did this we also learned what the symbols meant when drawing out a circuit and how to use the Arduino. Some of the things we did with the LEDs are a simple circuit, adding a resistor, putting a switch in the circuit, parallel wiring and RGB LEDs. You can see pictures of the simple circuit with a swtich and the parallel wiring on the breadboard. I also learned that the holes in the breadboard run parallel with each other so in order to connect the different parts of the circuit, they have to be in the same column. The resistor is used so that the 9 volt battery is not giving too much charge to the LED causing it to burn out. on top of that, the positive leg of the LED is the longer leg, and the shorter leg is the negative. I now have a clearer understanding of how all of the components work and flow together. 
Tag Archives: Art&Design
Makerspace Accessory Competition
My group, Kennedy, Elizabeth and I, chose to create a device to hold/store the USB drives. We noticed that all of them had cords, so we chose to create something like a hook hanging off the table. We originally had three ideas, the other two being a series of hooks that hang from the wall, a bin that had a magnetic back to hang from the whiteboard. The final product slides onto the table and you can then screw it into the table with the graduated hole in the bottom. Creating the graduated hole was probably the hardest part of the project because of all of the different surfaces and trying to get the circle on the right surface to push/pull it so it disappeared. I think we did a good job of taking the measurements and recreating our idea in SketchUp.