Our latest Art & Design project was LED it Up! where we learned how to make assorted LED lights turn on by creating circuits with breadboards, coin batteries, wires, switches, and resistors. We first were taught how to make a simple circuit by holding an LED to a coin battery. In doing this, we learned to line up the positive side of the coin battery with the negative side of the LED and vise versa. Next, things got a little more complicated when we added a switch to the mix. In the next video, we learned how to make the LED light up by using a switch, coin battery, and wires. First, we snapped the coin battery into a coin battery holder, and attached a wire to the metal hole on each side. Then to one wire, we attached a switch, and to the other, we placed a “female” wire. To the switch, we added another wire and to the wire, we added another “female” wire. To the “female” wires, we inserted the LED light. Lastly, we flipped the switch, and the LED was illuminated. 
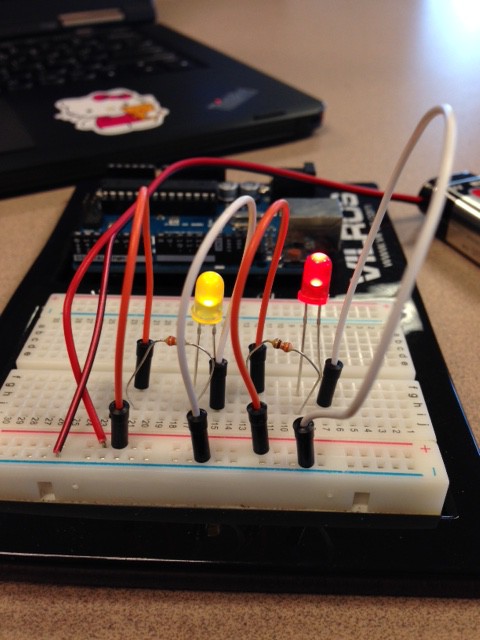
The third thing I learned was how to make an LED light up by using a breadboard, 9 volt battery, and resistors. We attached the battery to its corresponding positive/negative row. Resistors were connected to the battery by wires, and the LED was connected to the resistor by other joining wires. Overall, these projects were very interesting to complete, and the videos were very helpful. Though some troubleshooting was required, it was very exciting to see the LED light up when you were able to complete the circuit correctly.